


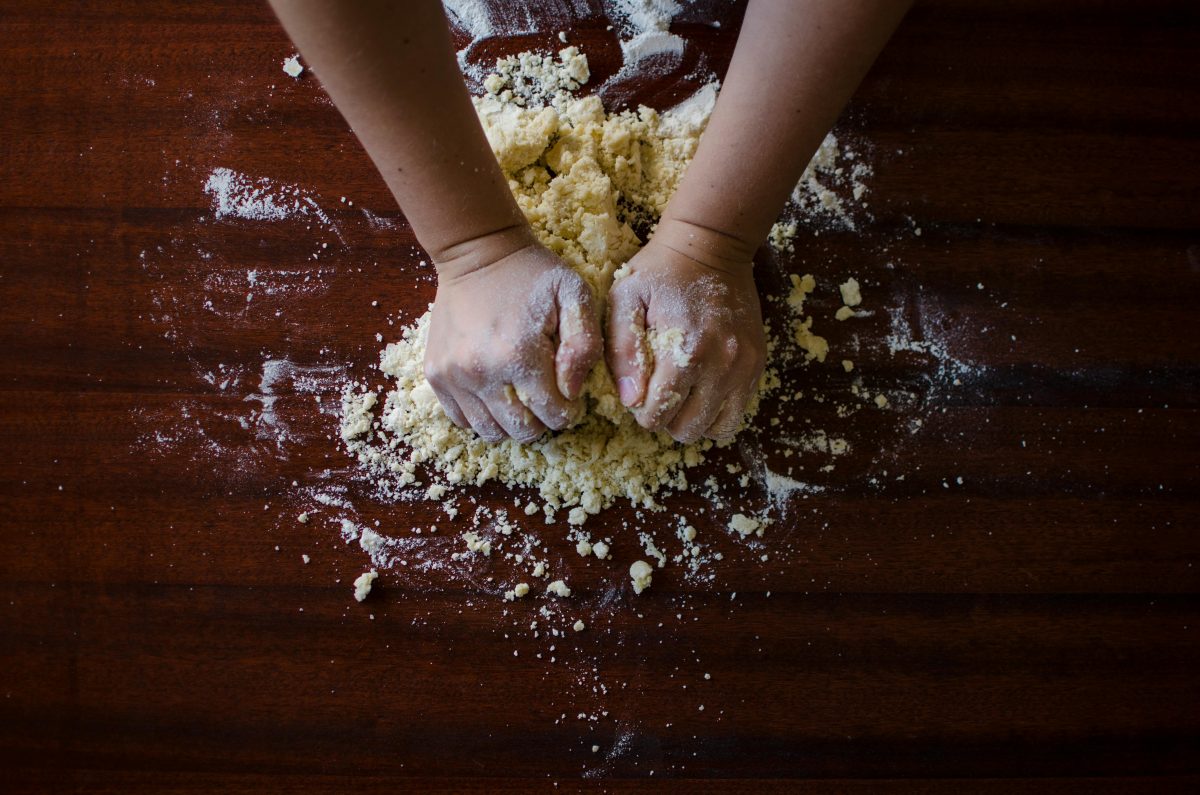
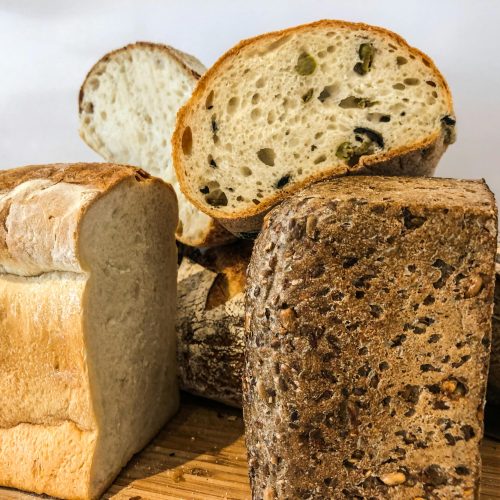
Tired of store-bought bread that tastes, well, store-bought? Imagine sinking your teeth into a slice of warm, crusty bread, its aroma filling your kitchen, knowing you made it yourself from freshly milled flour. It’s not just bread; it’s an experience, a connection to an age-old craft that brings incredible flavour and nutrition to your table. If you’ve been curious about baking with fresh milled flour, you’re in for a treat. This guide will walk you through the simple yet rewarding process of creating your own delicious fresh milled flour bread.
Why Fresh Milled Flour?
You might be wondering what the fuss is all about. Isn’t all flour the same? Not really! The moment wheat berries are milled, the delicate oils, vitamins, and minerals within the germ and bran begin to oxidize. Store-bought flours often have these nutritious components removed to prolong shelf life, leaving you with a product that, while convenient, lacks the full spectrum of nutrients and the vibrant flavour of its freshly milled counterpart.
The Nutritional Advantage
When you mill your own flour, you retain 100% of the wheat berry’s goodness. This means you’re getting all the fibre, B vitamins, Vitamin E, healthy fats, and trace minerals that are often stripped away in commercial processing. This makes your bread not only more delicious but also significantly more nourishing.
The Flavour Revolution
Prepare for a taste revelation! Freshly milled flour brings an unparalleled depth of flavour to your bread. Depending on the type of wheat berry you use (hard red wheat for robust flavour, hard white wheat for a milder taste), your bread will have nutty, earthy, and subtly sweet notes that simply aren’t present in bread made with conventional flour. It’s a difference you can truly taste and appreciate.
Getting Started: Your Milling Essentials
Before you dive into baking, you’ll need a few things to get your milling journey started.
Choosing Your Mill
The heart of fresh milling is, of course, your grain mill. There are several types available, from manual hand mills to electric countertop models. For regular baking, an electric mill is a fantastic investment.
Electric Grain Mills
These are convenient and efficient, grinding a large quantity of flour in minutes. Brands like Mockmill, Nutrimill, and KoMo are popular choices known for their durability and performance. Consider the grind settings – you’ll want to be able to adjust from coarse to fine.
Hand Mills
If you prefer a more traditional approach or want a backup, hand mills are a great option. They require more effort but are excellent for smaller batches or if you’re off-grid.
Sourcing Quality Wheat Berries
The quality of your wheat berries directly impacts the quality of your flour and, ultimately, your bread. Look for organic, non-GMO wheat berries from reputable suppliers.
Hard Red Wheat
This is a popular choice for bread baking due to its high protein content, which develops strong gluten for a good rise and chewy texture. It yields a robust, slightly nutty flavour.
Hard White Wheat
Similar to hard red wheat in protein content, but with a milder flavour and lighter crumb. It’s often preferred by those who find hard red wheat too assertive.
Other Grains
Once you’re comfortable, you can experiment with other grains like spelt, rye, or even ancient grains like Einkorn and Emmer for different flavours and textures.
The Fresh Milled Flour Bread Recipe
Now for the main event! This recipe is designed to be straightforward and forgiving, perfect for beginners. It uses a no-knead method, which allows the long fermentation to develop flavour and gluten structure with minimal effort from you.
Ingredients
- Freshly Milled Flour: 450g (approximately 3 ½ cups, depending on how you measure) – ideally a hard red or hard white wheat.
- Warm Water: 350g (approximately 1 ½ cups) – about 95-105°F (35-40°C).
- Active Dry Yeast: 1 teaspoon
- Salt: 9g (about 1 ½ teaspoons)
- Optional: 1 tablespoon honey or maple syrup (for a touch of sweetness and to help activate yeast, though not strictly necessary if your yeast is fresh)
Equipment
- Large mixing bowl
- Spatula or wooden spoon
- Plastic wrap or a damp kitchen towel
- Dutch oven or heavy-bottomed pot with a lid (oven-safe)
- Parchment paper (optional, but highly recommended for easy transfer)
- Banneton (proofing basket) or a bowl lined with a floured kitchen towel
Instructions
Step 1: Mill Your Flour
Measure out your wheat berries and mill them on a fine setting. Feel the warmth and smell the fresh aroma – that’s the sign of truly fresh flour!
Step 2: Combine Wet Ingredients
In your large mixing bowl, combine the warm water, yeast, and optional honey/maple syrup. Stir gently and let it sit for 5-10 minutes until the yeast becomes foamy (this indicates it’s active).
Step 3: Add Dry Ingredients
Add your freshly milled flour and salt to the wet ingredients. With a spatula or wooden spoon, mix until just combined. Don’t worry about kneading; simply ensure all the flour is hydrated. The dough will be shaggy and sticky.
Step 4: First Rise (Bulk Fermentation)
Cover the bowl with plastic wrap or a damp kitchen towel and let it rise at room temperature for 12-18 hours. The longer the rise, the more flavour will develop. The dough should roughly double in size and have bubbles visible on the surface.
Step 5: Shape the Dough
Lightly flour your work surface. Gently scrape the dough out of the bowl onto the floured surface. Using floured hands, gently fold the edges of the dough towards the centre, forming a loose ball. Avoid overworking the dough.
Step 6: Second Rise (Proofing)
Lightly flour your banneton or a bowl lined with a well-floured kitchen towel. Carefully transfer the shaped dough, seam-side up, into the prepared banneton/bowl. Cover with plastic wrap or a damp towel and let it proof for 1-2 hours at room temperature, or place it in the refrigerator for 2-4 hours (or even overnight) for a slower, more flavourful proof. The dough should feel light and airy.
Step 7: Preheat Your Oven and Dutch Oven
About 30-45 minutes before you’re ready to bake, place your Dutch oven with its lid into your oven and preheat to 450°F (230°C). This is crucial for achieving a crispy crust.
Step 8: Bake Your Bread
Carefully remove the hot Dutch oven from the oven. If using parchment paper, gently lift the dough from the banneton/bowl and transfer it, still on the parchment, into the hot Dutch oven. If not using parchment, carefully invert the dough directly into the hot pot. You can score the top of the dough with a sharp knife or razor blade if desired (about ½ inch deep).
Cover the Dutch oven with its lid and bake for 30 minutes.
Step 9: Finish Baking
After 30 minutes, remove the lid from the Dutch oven. Reduce the oven temperature to 400°F (200°C) and continue baking for another 15-20 minutes, or until the crust is deeply golden brown and sounds hollow when tapped on the bottom.
Step 10: Cool and Enjoy!
Carefully remove the bread from the Dutch oven and transfer it to a wire rack to cool completely. This step is important! Slicing into warm bread can release steam and make it gummy. Let it cool for at least an hour before slicing and enjoying your incredible homemade fresh milled flour bread.
Don’t Miss!: Easy No-Bake Brownie Refrigerator Cake Recipe
Fresh Milled Flour Bread Recipe
Equipment
- Grain mill Electric or hand-crank
- Large mixing bowl
- Dutch oven Or heavy oven-safe pot with lid
- Banneton (proofing basket) Or bowl lined with floured towel
- Bench scraper Helpful for handling sticky dough
Ingredients
- 450 g freshly milled flour (hard red or hard white wheat) about 3 ½ cups
- 350 g warm water about 1 ½ cups, 95-105°F (35-40°C)
- 1 tsp active dry yeast
- 9 g salt about 1 ½ teaspoons
Instructions
- Mill your wheat berries on a fine setting to produce 450g of fresh flour.
- In a large mixing bowl, combine warm water, yeast, and optional honey/maple syrup. Let sit 5-10 minutes until foamy.
- Add freshly milled flour and salt to the wet ingredients. Mix until just combined (dough will be shaggy and sticky).
- Cover bowl and let rise at room temperature for 12-18 hours until doubled in size with surface bubbles.
- Lightly flour a work surface and gently shape dough into a loose ball without overworking.
- Transfer dough to a floured banneton or bowl, seam-side up. Cover and proof 1-2 hours at room temperature or 2-4 hours in refrigerator.
- Preheat Dutch oven in a 450°F (230°C) oven for 30-45 minutes before baking.
- Carefully transfer dough to preheated Dutch oven. Score top if desired. Bake covered for 30 minutes.
- Remove lid, reduce temperature to 400°F (200°C), and bake uncovered for 15-20 minutes until deeply golden.
- Cool completely on wire rack (at least 1 hour) before slicing.
Tips for Success
- Don’t Over-Knead Fresh Milled Flour: Freshly milled flour absorbs water differently and its gluten develops quickly. Over-kneading can lead to a dense crumb. The no-knead method works perfectly.
- Adjust Hydration: The exact amount of water needed can vary slightly depending on the specific wheat berry and even the humidity. If your dough feels too dry, add a tablespoon or two more water. If it’s too wet, add a little extra flour.
- Embrace the Stickiness: Fresh milled flour dough can be stickier than conventional flour dough. Use a light dusting of flour on your hands and work surface, and a bench scraper can be your best friend.
- Experiment with Wheat Berries: Once you’re comfortable, try different types of wheat berries to discover your favourite flavour profiles and textures.
- Patience is Key: Bread baking, especially with fresh milled flour, rewards patience. Don’t rush the bulk fermentation or proofing stages.
Troubleshooting Common Issues
- Dense Crumb: This often indicates under-proofing (not enough rise time) or over-working the dough. Ensure your yeast is active and give the dough ample time to rise.
- Flat Loaf: Similar to a dense crumb, this can be due to under-proofing or over-proofing (where the gluten structure collapses). It can also happen if your oven wasn’t hot enough or if you didn’t use a Dutch oven for the initial bake.
- Crust Not Crispy: Ensure your Dutch oven is fully preheated and that you bake with the lid off for the last portion of the bake. Steam created by the lid during the initial bake is crucial for crust development.
Frequently Asked Questions (FAQ)
Q1: Do I need a special mill for fresh milled flour?
A1: Yes, you’ll need a grain mill designed for home use. Electric mills are convenient for regular baking, while hand mills are good for smaller batches or if you prefer a manual approach.
Q2: Where can I buy wheat berries?
A2: You can find wheat berries online from specialty grain suppliers, at health food stores, or sometimes directly from local farms. Look for organic, non-GMO options.
Q3: How long does freshly milled flour last?
A3: Freshly milled flour has a shorter shelf life than commercial flour because it retains the germ and bran, which contain oils that can go rancid. It’s best used within a few days of milling. For longer storage, you can freeze it in an airtight container for up to a month.
Q4: Can I use this recipe with other types of grain like spelt or rye?
A4: While this recipe is designed for hard wheat, you can experiment with other grains. However, you may need to adjust the water content as different grains absorb water differently. Spelt often requires less water, and rye creates a denser loaf with less gluten.
Q5: My dough is very sticky, is that normal?
A5: Yes, freshly milled flour dough, especially with higher hydration, can be quite sticky. Use a light dusting of flour on your hands and work surface, and a bench scraper can help manage it. Avoid adding too much extra flour, as this can make the bread dry.
Q6: Can I make this bread without a Dutch oven?
A6: While a Dutch oven is highly recommended for achieving a great crust and rise, you can bake it on a preheated baking stone or a heavy baking sheet. You can create steam by placing a tray of hot water on the bottom rack of your oven during the first part of the bake. However, results may vary.
Baking with fresh milled flour is a journey of discovery that promises incredibly flavourful and nutritious bread. With this guide, you have everything you need to start your own baking adventure. Enjoy the process, savour the aroma, and delight in the taste of real, homemade bread.